Festive Graduation Cake Pops
Highlighted under: Festive Feast Kitchen
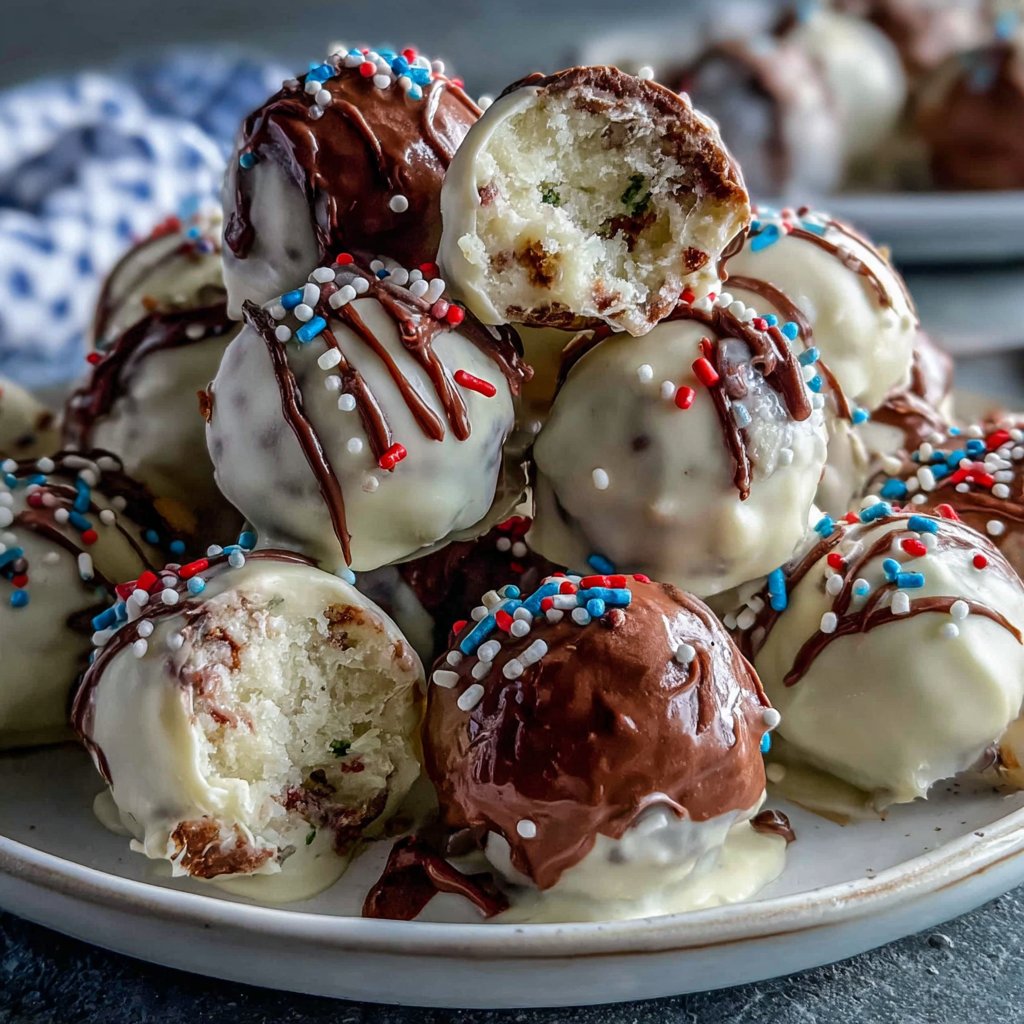
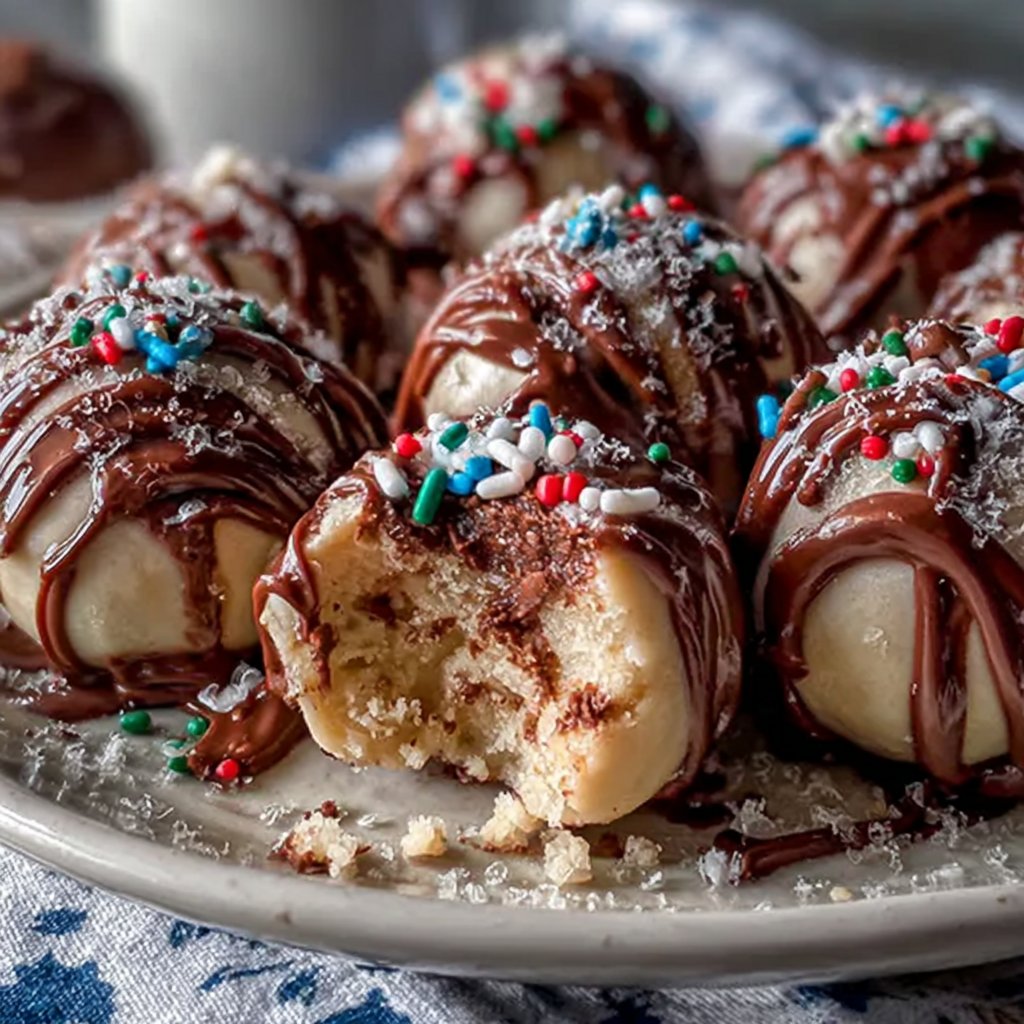
I absolutely love creating these Festive Graduation Cake Pops! They are the perfect way to celebrate a special achievement while being fun and delicious. The rich chocolate cake paired with a creamy frosting center makes these pops irresistible. Dipping them in colorful chocolate and garnishing with sprinkles is not only easy but allows for endless personalization. Whether you're throwing a graduation party or just want a cute treat to make, these cake pops are sure to impress guests and graduates alike!
Making these graduation cake pops was such a delightful experience! I started by baking a classic chocolate cake, which I let cool completely before crumbling it to mix with frosting. The trick I discovered was to use just the right amount of frosting so that the mixture holds together perfectly without being overly sweet.
Once the cake mixture was ready, shaping them into neat balls was enjoyable, and I realized that chilling them before dipping in chocolate prevented them from falling apart. Decorating with vibrant toppings turned the dessert into edible little graduation caps, which added to the festive atmosphere!
Why You'll Love This Recipe
- Cute and festive presentation that brightens up any graduation party
- Adaptable to all tastes with various cake and chocolate flavors
- Easy to make ahead, simplifying party preparations
Perfecting the Cake Texture
The texture of your cake pops is crucial for their success. When crumbling the cake, ensure you break it down to fine crumbs without any large chunks, as these can create uneven textures in the final product. Ideally, the cake should be moist but not overly wet; if it feels too dry, a small amount of extra frosting can help achieve the right consistency for rolling into balls.
Another key aspect is the types of chocolate used in the candy melts. Choose high-quality melts for a smoother finish, as supermarket brands might not melt as smoothly. Make sure to follow the melting instructions carefully: heat in short bursts of 20-30 seconds, stirring in between, until fully melted and glossy.
Chilling for Ease and Structure
Chilling the shaped cake balls is essential for achieving stable pops that will hold their shape during the dipping process. After rolling them into balls, allow them to chill in the refrigerator for at least 15 minutes. This helps the frosting set slightly, making them less likely to collapse when you insert the lollipop sticks.
If the cake pops feel too soft after your initial chill, consider putting them in the freezer for a few additional minutes. However, avoid leaving them in too long, as this could make them difficult to dip into the melted candy coating.
Creative Decoration Ideas
When it comes to decorating, the options are practically endless! Use various colored chocolate melts to create a striking visual display. For a more sophisticated look, try drizzling contrasting chocolate over the dipped pops. Allow the base layer to harden slightly before applying the drizzle, ensuring it maintains its shape.
Feel free to get imaginative with your sprinkles—try edible glitter for a touch of shimmer or themed decorations that match the graduate's school colors. This not only adds a festive touch but also personalizes the cake pops for the occasion.
Ingredients
Gather the following ingredients for your festive cake pops:
For the Cake Pops
- 1 chocolate cake (9-inch, baked and cooled)
- 1/2 cup chocolate frosting
- 1 cup chocolate candy melts
- Assorted sprinkles or decorations
- Lollipop sticks
Make sure to have everything ready to make the process smooth!
Instructions
Follow these steps to create your own Festive Graduation Cake Pops:
Crumble the Cake
In a large bowl, crumble the cooled chocolate cake into fine crumbs. Ensure there are no large chunks remaining.
Mix with Frosting
Add the chocolate frosting to the crumbled cake and mix with your hands until fully combined. The mixture should be moist and easy to form.
Shape the Cake Pops
Roll the mixture into small balls, about 1 inch in diameter. Place them on a baking sheet lined with parchment paper.
Chill the Pops
Refrigerate the cake balls for 15 minutes to firm them up and make them easier to work with.
Melt the Candy Coating
In a microwave-safe bowl, melt the chocolate candy melts according to the package instructions until smooth.
Dip and Decorate
Insert a lollipop stick into each cake ball, then dip into the melted chocolate, tapping off the excess. Decorate with sprinkles before the chocolate hardens.
Allow to Set
Place the decorated cake pops in a styrofoam block or stand to allow them to set fully. This can take about 30 minutes.
Enjoy your sweet creations with friends and family!
Pro Tips
- For a fun twist, try using different cake flavors or adding extracts to the frosting for an extra hint of flavor.
Long-term Storage Tips
If you want to make your cake pops ahead of time, they can be frozen for later use. Once fully assembled and decorated, place them in an airtight container between layers of parchment paper to prevent sticking. They can be frozen for up to 3 months. To serve, simply remove from the freezer and allow to thaw in the fridge for a few hours.
Avoid refreezing once thawed, as this can lead to a soggy texture. For best results, consume your frozen pops within a few days of thawing to enjoy their optimal flavor and texture.
Scaling the Recipe
This recipe can easily be scaled up or down, depending on the number of guests at your celebration. If you need to make a larger batch, simply multiply the ingredients evenly. Keep in mind that your chilling time may also increase slightly when handling larger quantities, so be patient while waiting for the pops to firm up.
Conversely, if you want to make a smaller batch, you could use half of the ingredients. Just be sure to adjust your melting and setting times appropriately to maintain the pops' structural integrity.
Troubleshooting Common Issues
If your candy coating isn't adhering well to the cake pops, it could be due to the pops being too cold or the coating being too thick. Try warming the pops slightly in your hands before dipping, and ensure that the melted coating is smooth and pourable. Adding a small amount of shortening or coconut oil to the melts can improve fluidity and adhesion.
In case the cake balls are falling off the sticks during the dipping, ensure they're adequately chilled and that you've inserted the sticks deep enough into the center to provide stability. A little extra frosting on the tip of the stick can also help secure them better inside the cake ball.
Questions About Recipes
→ Can I use a box cake mix for this recipe?
Absolutely! Box cake mixes work well in this recipe and can save you time.
→ How long can I store cake pops?
You can store cake pops in the refrigerator for up to a week in an airtight container.
→ What can I use instead of lollipop sticks?
If you don’t have lollipop sticks, you can use pretzel sticks or candy sticks as an alternative.
→ Can I freeze cake pops?
Yes! Freeze them before dipping and once decorated. Just let them thaw in the fridge before serving.
Festive Graduation Cake Pops
Created by: The Bitehut Team
Recipe Type: Festive Feast Kitchen
Skill Level: Intermediate
Final Quantity: 24 pops
What You'll Need
For the Cake Pops
- 1 chocolate cake (9-inch, baked and cooled)
- 1/2 cup chocolate frosting
- 1 cup chocolate candy melts
- Assorted sprinkles or decorations
- Lollipop sticks
How-To Steps
In a large bowl, crumble the cooled chocolate cake into fine crumbs. Ensure there are no large chunks remaining.
Add the chocolate frosting to the crumbled cake and mix with your hands until fully combined. The mixture should be moist and easy to form.
Roll the mixture into small balls, about 1 inch in diameter. Place them on a baking sheet lined with parchment paper.
Refrigerate the cake balls for 15 minutes to firm them up and make them easier to work with.
In a microwave-safe bowl, melt the chocolate candy melts according to the package instructions until smooth.
Insert a lollipop stick into each cake ball, then dip into the melted chocolate, tapping off the excess. Decorate with sprinkles before the chocolate hardens.
Place the decorated cake pops in a styrofoam block or stand to allow them to set fully. This can take about 30 minutes.
Extra Tips
- For a fun twist, try using different cake flavors or adding extracts to the frosting for an extra hint of flavor.
Nutritional Breakdown (Per Serving)
- Calories: 180 kcal
- Total Fat: 8g
- Saturated Fat: 4g
- Cholesterol: 30mg
- Sodium: 85mg
- Total Carbohydrates: 26g
- Dietary Fiber: 1g
- Sugars: 15g
- Protein: 2g